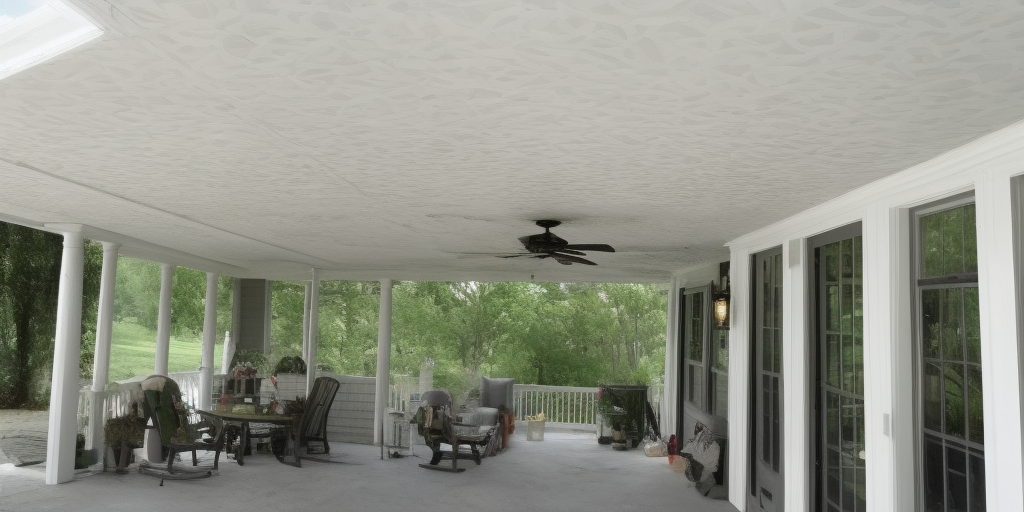
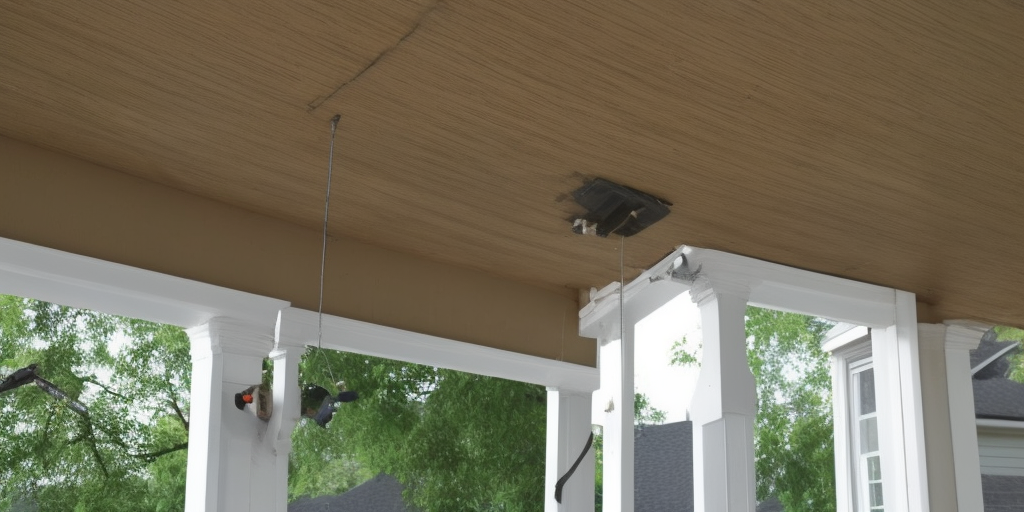
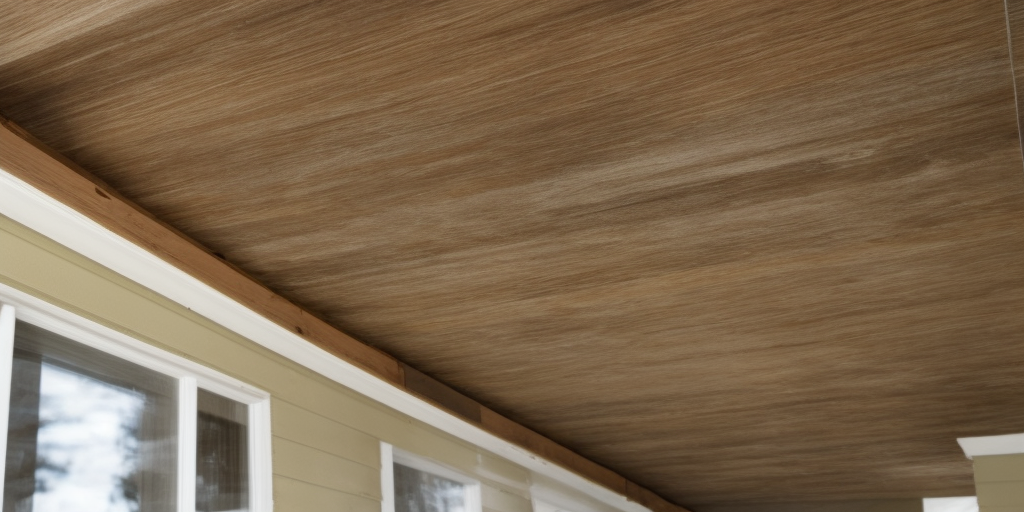
Do you want to know how to fix a porch ceiling, we have the right information for you? If you’re a homeowner with a porch, you know how important it is to keep it in good condition. A porch ceiling can be prone to wear and tear, especially if it’s exposed to the elements.
If your porch ceiling is in need of repair, don’t worry. With some basic tools and a little know-how, you can fix it up in no time. In this submission, we’ll show you how to fix a porch ceiling so that it looks as good as new.
Depending on the material you use, you can repair the porch ceiling in many ways. We will cover Tongue-and-groove planks, Beadboard, Fiber cement board, and Hardboard. In addition, you can find tips and tricks for repairing your porch ceiling. Just read on to get started. After all, you’re doing something that’s not just decorative – you’re saving money.
Porch ceiling repair: How to do it yourself?
Contents
- 1 Porch ceiling repair: How to do it yourself?
- 2 What are the steps to fix a porch ceiling?
- 3 What tools are needed to fix a porch ceiling?
- 4 How long does it take to fix a porch ceiling?
- 5 How to fix water damage on a porch ceiling
- 6 Best paint for repairing a porch ceiling
- 7 How to repair a sagging porch ceiling
- 8 Step-by-step guide to fix cracks in a porch ceiling
- 9 How to replace a section of a porch ceiling
- 10 Tips for fixing a popcorn-textured porch ceiling
- 11 How to fix a peeling porch ceiling
- 12 DIY porch ceiling repair for beginners
- 13 How to fix a porch ceiling without removing it
- 14 Repairing a plaster porch ceiling: step-by-step guide
- 15 How to fix a porch ceiling of beadboard
- 16 How to fix a porch ceiling of tongue-and-groove planks
- 17 How to fix a porch ceiling of with fiber cement board
- 18 How to fix a porch ceiling of hardboard
- 19 Final thoughts on how to fix a porch ceiling
If you’re looking to repair your porch ceiling, you can save a lot of money by doing it yourself. Porch ceiling repair can involve fixing water damage, repairing cracks or holes, or even replacing the entire ceiling. The first step is to assess the damage and determine what type of repair is needed.
For water damage, it’s important to find the source of the leak and fix it before repairing the ceiling. For cracks or holes, you’ll need to fill them in with spackle or joint compound, then sand and paint over the repair. If the entire ceiling needs to be replaced, it’s a good idea to have a helper, as the ceiling panels can be heavy and difficult to maneuver.
Before you begin any porch ceiling repair project, it’s important to gather all the necessary tools and materials. Depending on the extent of the damage, you may need a ladder, screwdriver, saw, joint compound, spackle, sandpaper, paint, and primer. If you’re not sure what you need, it’s a good idea to consult with a hardware store employee or online tutorial.
Once you have everything you need, it’s time to get started. Make sure you take your time and follow the instructions carefully, as rushing the repair can lead to mistakes and further damage. With some patience and effort, you can repair your porch ceiling and make it look as good as new. use this DIY guide to fix a porch ceiling to help.
What are the steps to fix a porch ceiling?
Fixing a porch ceiling can be a daunting task, but it can be done with the right steps and tools. The first step is to determine the extent of the damage and the type of repair needed. Common porch ceiling issues include water damage, cracks, and holes. Once you have identified the problem, you can proceed with the repair.
For water damage, it’s important to first find and fix the source of the leak before repairing the ceiling. For cracks and holes, you’ll need to fill them in with spackle or joint compound, then sand and paint over the repair. If the entire ceiling needs to be replaced, it’s best to remove the old ceiling first before installing a new one.
The next step is to gather the necessary tools and materials. These can include a ladder, saw, screwdriver, joint compound, spackle, sandpaper, primer, and paint. It’s important to have everything on hand before starting the repair to avoid interruptions or delays.
Once you have everything you need, you can start the repair process. Be sure to follow the instructions carefully and take your time to ensure a successful repair. With some effort and patience, you can fix your porch ceiling and restore it to its original beauty.
What tools are needed to fix a porch ceiling?
To repair a porch ceiling, you will need a wide variety of tools that can handle a variety of tasks. Basic tools include a hammer, a saw, a drill, and a level. You will also need a variety of screws and nails to properly secure the structure. It is also important to have a wide selection of weatherproof sealants and caulks to protect the porch ceiling from moisture damage.
In addition to the basic tools, you will also need some specialty tools to complete the job. A reciprocating saw is helpful for cutting through existing wood trim and boards. A nail gun can also be used to quickly secure the new boards in place. A power sander is also helpful for smoothing down any rough edges or imperfections before painting. Having the right tools on hand is essential to ensure a successful repair job.
How long does it take to fix a porch ceiling?
The amount of time it will take to repair a porch ceiling will vary based on the complexity of the job. Most simple repairs can be completed in a single day, although more extensive repairs may require multiple days to complete.
If you are planning a major renovation, it is best to factor in a few days in order to account for the potential unforeseen hold-ups. No matter what kind of repair you plan to do, always make sure to give yourself plenty of time to complete the job with quality workmanship.
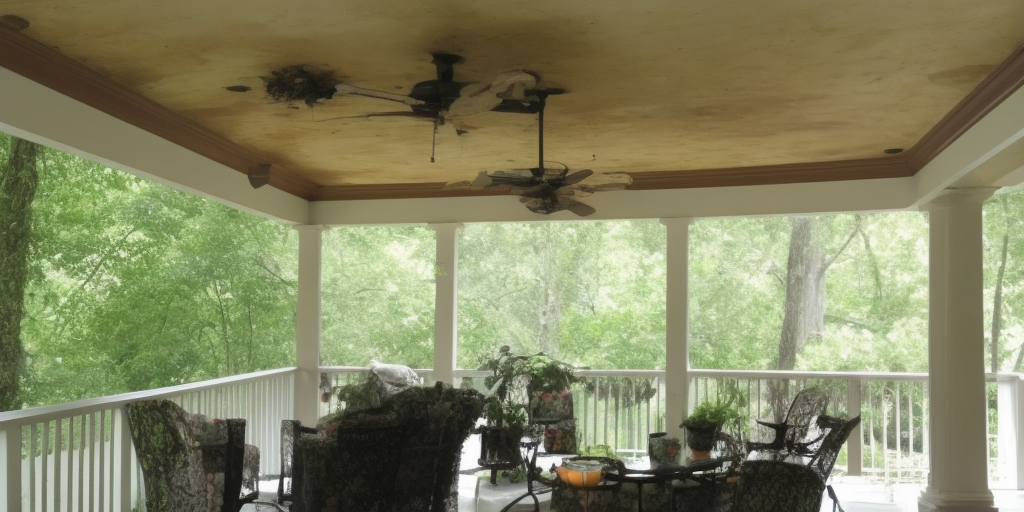
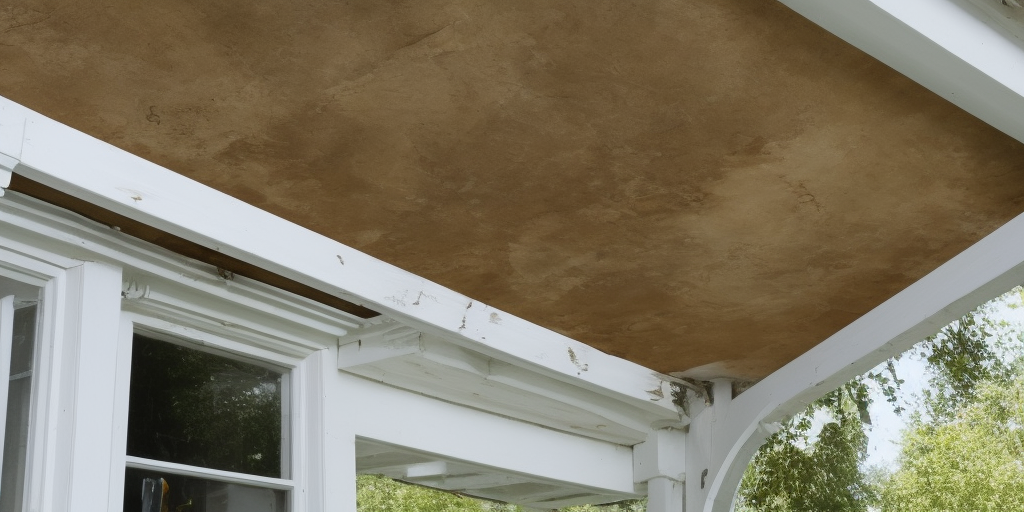
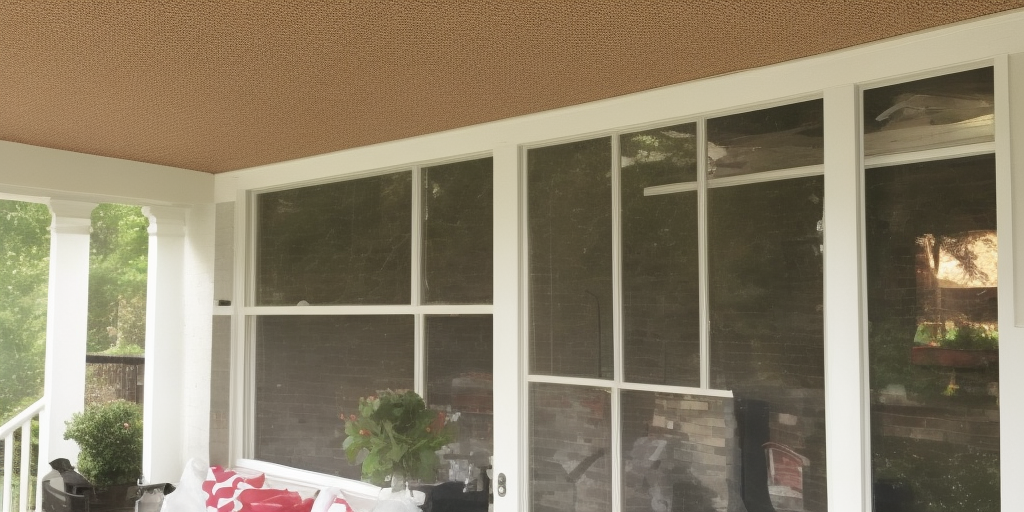
How to fix water damage on a porch ceiling
If there is water damage on a porch ceiling, it is important to repair the problem as soon as possible. Smaller issues of water damage can be addressed with relative ease by patching or replacing the affected area, while larger issues often require professional help. Before any repair begins, the source of the water damage must be identified and addressed.
To repair smaller patches of water damage, the affected area should be thoroughly cleaned to remove any remaining dirt, debris, and moisture. Once the area is totally dry, a waterproof plaster patch kit can be used to patch the area; this should be applied in thin coats to allow for the mix to dry properly.
If the damage is too severe, then the damaged area should be cut out and replaced with new plaster or drywall. After installation, a sealant should be applied over the entire area to ensure that no further water damage occurs. Larger areas may require professional help due to the complexity of the repair.
Best paint for repairing a porch ceiling
Picking the best paint for repairing your porch ceiling can be a daunting task. With such a large variety of paint available, it’s important to consider your options carefully before making a purchase. The most important factor to consider when deciding on paint for your porch ceiling is its longevity. Good paint should be able to stand up to the sun, rain, and other weather conditions without showing signs of wear.
Acrylic paint is generally the preferred choice in this regard, as it is durable, resistant to mold and mildew, and can be easily removed with mineral spirits if necessary. It’s also important to consider colors that complement your porch’s environment, as well as paint, and finishes like glossy, matte, or eggshell that should be chosen depending on your porch’s location and usage.
In addition to choosing the right finish and color, it’s also important to select high-quality paint designed specifically for porch ceilings. Many paints designed for interior walls and ceilings may not have the same outdoors-friendly qualities that are necessary for a successful repair job. Acrylic porch ceiling paints are usually the best choice for exterior surfaces due to their superior durability, waterproofing, and mildew resistance. Paints designed for the outdoors also tend to be more resistant to fading.
How to repair a sagging porch ceiling
Repairing a sagging porch ceiling can be done easily and quickly using simple tools. The first step is to identify which joists are sagging, as well as whether or not they are attached properly to the railings. This can be done by looking for gaps between the joists and the railings. If gaps are found, this is a sign that the joists might be loose or not attached properly.
Once the loose joists have been located and identified, wood blocks should be installed between the joists and the railings to provide additional support to the ceiling. The blocks should be screwed into place using wood screws. After the blocks are installed, the ceiling should be inspected to make sure that it is level and secure.
If additional repairs are needed, the filler may be used between any gaps or cracks in the ceiling. Finally, the repair should be sealed with an outdoor waterproofing sealer to ensure a long-lasting repair.
Step-by-step guide to fix cracks in a porch ceiling
Cracks in a porch ceiling can be an eyesore but they are relatively easy to repair. The first step in repairing a crack in a porch ceiling is to remove any debris from the area. This can include broken material from the crack, dust, dirt, and any plants or moss that are growing in the crack.
Next, you should fill the crack with flexible filler material that can expand and contract with changes in temperature. Make sure to fill the crack completely, pushing the filler material into the sides of the crack to provide a strong bond.
Once the filler material is in place, you will need to sand the area using an orbital sander, taking care not to sand too deeply and remove too much of the existing material. To provide a barrier against water damage, you should use a sealant or waterproofing product on top of the repaired area, making sure to follow the instructions on the packaging.
Finally, you should apply a fresh coat of paint over the repair site, taking care to feather the edges of the paint out to the edges of the porch ceiling. With these steps, you can easily fix cracks in a porch ceiling quickly and effectively.
How to replace a section of a porch ceiling
Replacing a section of a porch ceiling is a job that should be taken seriously in order to ensure that it is replaced correctly and safely. The first step to replacing a section of a porch ceiling is to identify any areas that need to be replaced.
This might be caused by water damage, chipping paint, or nail pops. It is important to identify the cause of the damage, as this will help you determine the best course of action. Once the area in need of repair has been identified, the next step is to remove the damaged area of the ceiling.
This is done by using a crowbar to carefully remove any nails holding the boards in place and then remove the damaged sections. After the damaged area has been removed, the ceiling must be prepared for replacement. This typically involves scraping the area to remove any remaining nails, chipped paint, and other debris.
The new boards should then be cut to fit the measurements of the hole in the ceiling and affixed using galvanized nails. Finally, the area should be cleaned to ensure a snug fit, and any necessary caulk or grout should then be applied to create a finished look.
Tips for fixing a popcorn-textured porch ceiling
One of the best tips for fixing a popcorn-textured porch ceiling is to make sure you have the right tools and materials. Factors such as the type of ceiling popcorn, the condition of the existing finish, and the amount of area you need to cover will help you determine what type of primer, paint, and supplies will be necessary.
For instance, oil-based primers and paints are typically recommended when working with popcorn finishes, as they can better penetrate the texture and provide better coverage than their water-based counterparts. In addition, you’ll need drop cloths, a paint brush, roller covers, a stir stick and a pole paint roller specifically designed to reach ceiling walls.
Before application, you should always repair any damage to the underlying surface. When the popcorn texture is still in place and not in bad condition, use masking tape and plastic sheeting to cover any heating vents, ducts, and light fixtures, then fill any holes with patching compound.
After all the surfaces and cracks have been prepped, you can start priming, which will prevent the colors in your new coat of paint from seeping into the previous layer of finish. Finally, finish off by selecting a color based on whether you want to maintain a flat finish or not.
How to fix a peeling porch ceiling
Fixing a peeling porch ceiling is not as difficult as it might seem. The first step is to clean the surface with a degreaser and sand it lightly to remove any loose paint or debris. Then you need to patch any areas that are severely cracked or crumbling. You can use joint compound and a putty knife to fill in any major gaps, and then use caulk to fill in any smaller cracks.
Once the patching is complete, you can apply a primer coat to the porch ceiling. This helps to ensure a better bond between the paint and the surface. Use a paint brush to apply two coats of exterior paint, allowing the paint to dry completely between each coat. Once everything is fully dry, your porch ceiling will be looking fresh and new. If desired, you can seal the finished paint job with an exterior sealant for maximum protection.
DIY porch ceiling repair for beginners
DIY porch ceiling repair for beginners can be an intimidating project, but with the right preparation and steps, it can be done. Before beginning the repair, it’s important to inspect the ceiling for any signs of damage or instability.
If you notice any water damage, replace the broken pieces of wood and repair the water source. Also, check for any holes or cracks that need to be filled or sealed. Once you’ve completed the necessary repairs, you can refresh or paint the ceiling.
If you’re painting the porch ceiling, clean it with a pressure washer or mild detergent and warm water. Make sure it has fully dried before you begin painting. You may want to check the ceiling for any noticeable signs of damage or pest infestation that could compromise your paint job.
Once the area is prepped, you will want to prime the porch ceiling prior to painting. This will ensure a more seamless, consistent finish. When painting, make sure you use high-quality paint formulated specifically for outdoor use.
How to fix a porch ceiling without removing it
Fixing a porch ceiling without removing it can be done in several ways, depending on the type of material and the extent of the damage. For instance, if the problem is just superficial, such as paint or water damage, it can usually be solved by sanding and repainting the area.
If the problem is more structural, installing a support beam may be necessary to prevent further damage. For ceilings made of wood, screws, nails, or glue can be used to reattach or reinforce parts of the ceiling that are starting to come apart. For ceilings made of drywall, holes can be patched and covered with a specialized drywall-repair compound.
Lastly, missing shingles, tiles, or pieces of siding can be replaced with new ones of the same type and texture. The key to fixing a porch ceiling without removing it is to identify the problem and the type of material and then act accordingly. With the right repair tools and techniques, it is possible to restore a porch ceiling that looks as good as—if not better than—before.
Repairing a plaster porch ceiling: step-by-step guide
Repairing a plaster porch ceiling is a great way to update the appearance of your outdoor space. With the right tools and knowledge, the task can be done pretty easily. This step-by-step guide will walk you through the process of repairing your plaster porch ceiling so you can restore its original luster.
The first step is to inspect the area to identify which sections of the plaster need repairing. Inspect the ceiling and take note of any loose pieces, cracks, or holes.
Once you’ve identified the obstructed areas, the next step is to sand down the surface to prepare it for repair. If there are loose pieces, use a putty knife to scrape them away. For any cracks or holes, you’ll need to use a trowel or putty knife to fill them in. Use a damp cloth to remove any excess material and let the patch dry fully before proceeding.
Next, sand the patched area using medium-grit sandpaper. This will help smooth out the patched area and help it blend in perfectly with the surrounding plaster.
Once the patch has been sanded, you can then spread the new plaster onto the ceiling. Use a trowel or putty knife to spread it out evenly.
How to fix a porch ceiling of beadboard
If your porch ceiling has become loose or has started to rot, there are some simple things that you can do to make it look better. To avoid this problem, make sure to take accurate measurements of your porch ceiling before you begin installing beadboard. After measuring your porch ceiling, divide the measurement by the true width of your beadboard. When cutting beadboard, use a miter saw to cut the strips to size.
If you want a more authentic-looking ceiling, you can install luan siding. This type of material is often used as an underlayment for linoleum floors. Its grain pattern makes it appear like real wood and can be stained or varnished for a more expensive look. If you’re unable to install luan, there are other materials that you can use for your porch ceiling.
Be sure to use a step-ladder or other tool that can support your weight. It can be a bit tricky to get onto a beadboard ceiling if you’re not familiar with the process. First, make sure that you have adequate lighting and ventilation on your porch. Also, make sure that the weather-resistant sealant is installed at all joints. Otherwise, be sure to put down waterproofing and sealant to prevent any moisture from penetrating the boards.
Next, install the first board with the groove side of the board against the wall. This board should be placed about one-quarter of an inch away from the wall. After that, use a pneumatic gun to nail the first board to the plywood underlayment. If you are unable to do so, use a hammer to tap it in place. Then, nail the second board in place and cover the previous board with lattice trim.
Another good option is installing a plywood porch ceiling. This material is cheaper and more durable than wood and resists moisture damage better than beadboard. You can install beadboard directly to the roof joists as well. For a more environmentally-friendly option, you can try fiber cement beadboard. These products are engineered with the latest technology. Because they’re made of fiber cement, they’re highly resistant to fire and moisture, which means that you’ll be doing your part in keeping the environment cleaner and safer.
How to fix a porch ceiling of tongue-and-groove planks
If you have a porch ceiling with tongue-and-groove plank construction, you’re likely wondering how to repair it. This is a fairly simple project, but there are some important things to know before starting. One common mistake is the end joints, which can cause the wood to shrink. Another common mistake is staining the planks while they’re still attached to the ceiling. Staining the ceiling isn’t as simple as it sounds, and can result in a messy and unattractive mess.
First, you should lay out your planks, tongue-side down. Next, you should apply a coat of primer on each plank. Ensure that the primer is brushed on a thin layer. This will prevent the planks from separating. Allow each piece of wood to dry before applying any finishing touches. Once the paint is dry, you can install lattice trim boards to cover the gap between the planks.
Before you start installing the first piece, take measurements of the ceiling. The length of your porch’s ceiling should be calculated by dividing the width of the plank by its true width. This way, you’ll know which board to cut and where to attach it. In addition, you should measure the width of each row of boards before you install them. Using a trim nailer, secure two nails at every joist crossing.
You can easily install a tongue-and-groove ceiling by yourself. Once you’ve done this, you’re ready to install the planks. Then, just nailed them with a nail gun. Glue is a better option than nails because it helps the wood contract and expand without destroying the groove. After all, a tongue-and-groove ceiling looks great, but it’s a one-time project and is very simple to do.
Another option for porch ceilings is to replace it. You can purchase tongue-and-groove planks at Home Depot, Lowes, or your local lumber yard. These boards are more durable and can be installed in almost any situation. If you’re not a handyman, you can use the instructions found in this article to replace the planks. So, get started on the repair right away and enjoy your new porch ceiling.
How to fix a porch ceiling of with fiber cement board
If you’re interested in installing a new ceiling on your porch, you can choose between beadboard or tray style ceilings. Fiber cement is a great choice because it’s both fire and moisture-resistant, and it can add curb appeal to your home. Installing fiber cement is a two-person project, and it requires special tools for cutting and installation. Here’s how to get a beautiful and durable porch ceiling that will last for years.
If you live in an area with consistent dry climates, vinyl beadboard is the best choice. However, if you live in a more humid climate, fiber cement beadboard is the way to go. This product is fire resistant and looks just like new wood. The beauty of this material is that it requires no maintenance and can last for years. Even better, the fiber cement board comes with a 50-year limited warranty!
Another choice is Hardie beaded porch panel, which mimics traditional wood beadboard. Hardie beadboard is noncombustible and will not attract pests. And, it’s easy to clean and maintain, since it’s made from composite material, which resists moisture and mold. And it’s easy to paint over it, too! Unlike traditional wood beadboard, you’ll never have to worry about peeling paint or deteriorating siding again!
If you’re not comfortable with painting the ceiling yourself, you can purchase a fiber cement board to cover the entire surface. This inexpensive material is not only attractive, but it has acoustic properties. You can color it to fit your decor. It looks like wood and comes in many different profiles, so you can find something that suits your space and color scheme. Fiber cement board is also available in different sizes compared to drywall and plywood. In addition to ceilings, you can install fiber cement boards as an insulating underlayment for tile.
Aside from being easy to install, it also looks great! It’s a great way to add curb appeal and create a stylish ceiling on your porch. Unlike other ceiling coverings, a porch ceiling can be made of a variety of materials, including bricks and wood. These materials have unique textures and grain patterns and are non-hazardous for human health. And they’re relatively cheap compared to real wood!
How to fix a porch ceiling of hardboard
If you are looking for tips on how to fix a porch ceiling of hardwood, you’ve come to the right place. Here you will learn how to replace a hardboard ceiling with plywood. Before you start, make sure the plywood you purchase is exterior grade, as interior-grade plywood can draw in moisture and separate. Choose a large-size board, as this will minimize the joins. However, a large-sized board will also weigh more and requires assistance from someone else to install it. Use a carpenter’s square to ensure that the panels are all sized and positioned to match the rest of the rafters.
When choosing the material for your porch ceiling, you must choose a material that’s low-maintenance and can be painted. Also, the material should have good insulation properties, so your porch is cooler during the summer months. Vinyl or wood are good choices for porch ceilings, but each has their pros and cons. Make sure you take the time to learn more about these materials before deciding on a material. Make sure you choose a material that will last and look good for years to come.
Wood strips are usually made of tongue-and-groove. They can be installed over existing plywood, beaded plywood, or planking. Be sure to mark any electrical boxes and air vents on the ceiling with pencil so you can avoid cutting them in the future. A jigsaw is useful for intricate cuts. This will give you the desired ceiling finish. In addition to making sure the wood is waterproof, it will also prevent the porch from warping in the future.
Before you begin, take the old plywood out of the porch ceiling. You need to install the J-channel at the center of the ceiling. Use four-inch-wide pieces. If you want to create a herringbone pattern, you’ll need more material. For a herringbone pattern, you’ll need to use a bit more plywood than usual. Alternatively, you can paint the whole ceiling with a single color. If you have the budget for a full-color or two-tone look, you can consider installing new hardboard soffit.
Final thoughts on how to fix a porch ceiling
In conclusion, we showed you how to fix a porch ceiling, making it easier to do. If you want to keep your porch looking its best, it’s important to take care of the ceiling. By following the steps outlined in this article, you can easily fix any damage that has occurred and ensure that your porch looks great for years to come.
Remember to inspect your porch ceiling regularly and address any issues as soon as they arise. With a little bit of effort, you can keep your porch in great condition and enjoy it for years to come. So go ahead and get started on fixing your porch ceiling today!