
How to replace pillars on porch is a common question, which we seek to address in full. Porches are an excellent addition to any home, providing a comfortable outdoor space for relaxation and entertainment.
However, over time, porch pillars can become damaged due to exposure to the elements or accidental impacts. Replacing porch pillars can seem like a daunting task, but with the right tools and some basic knowledge, you can do it yourself and give your porch a new look.
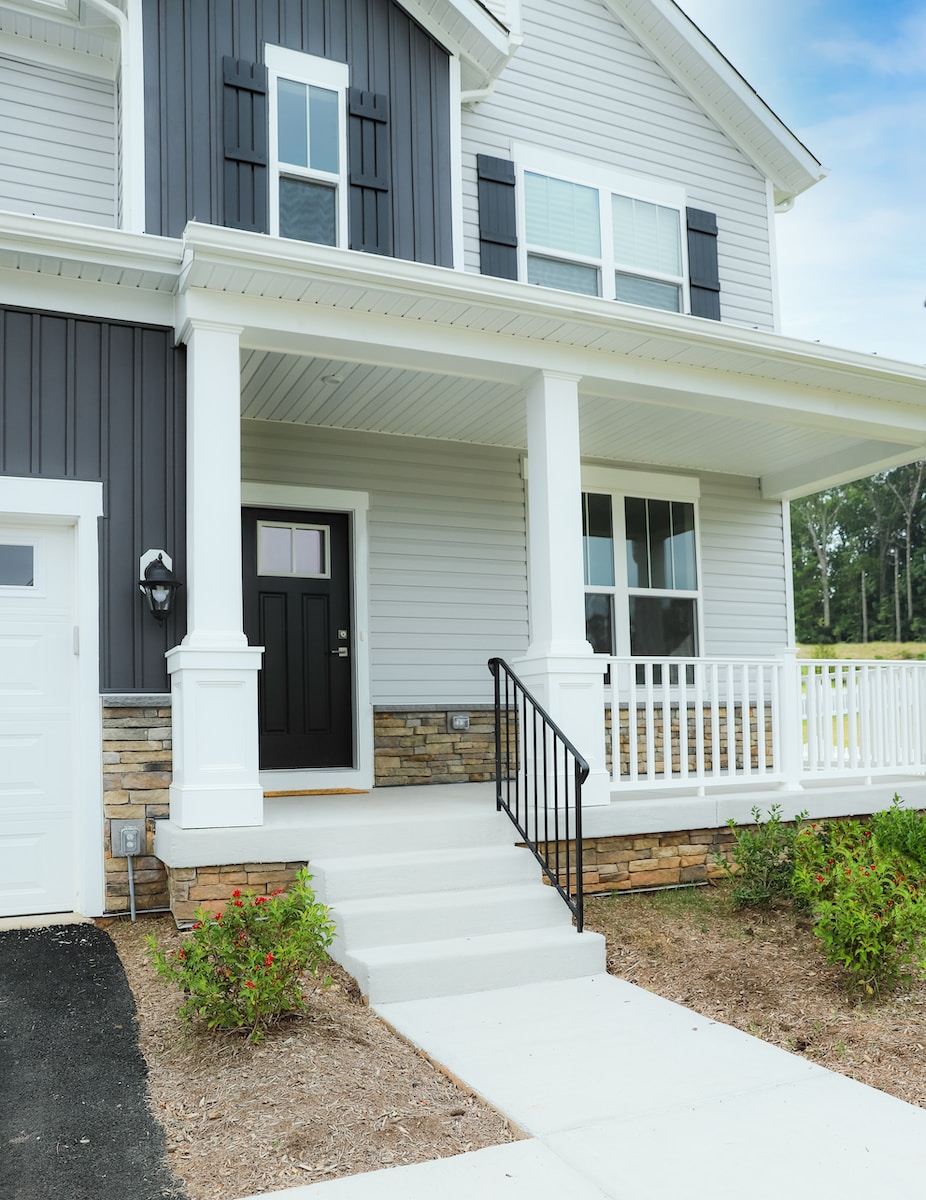
How to replace wooden pillars on porch
Contents
- 1 How to replace wooden pillars on porch
- 2 Can I replace porch pillars without removing the roof?
- 3 How to remove old porch pillars for replacement
- 4 How to install new porch pillars
- 5 How to reinforce porch pillars for stability
- 6 How much does it cost to replace porch pillars?
- 7 How to replace porch pillars with stone veneer
- 8 How to replace porch pillars with fiberglass
- 9 How to paint porch pillars after replacement
- 10 Can I replace porch pillars one at a time?
- 11 How to match new porch pillars with the existing ones
- 12 What materials are best for porch pillars replacement?
- 13 What tools do I need to replace porch pillars?
- 14 Our conclusion on how to replace pillars on porch
Replacing porch pillars can seem like a daunting task, but with the right tools and knowledge, it can be a manageable DIY project. Here are the steps to replace pillars on a porch:
Assess the damage: Before starting the repair, examine the porch pillars to determine the extent of the damage. If the pillars are rotting, cracked, or unstable, it may be time to replace them.
Remove the old pillars: Use a saw or pry bar to remove the old pillars from the porch. If the pillars are supporting a roof, use temporary supports to hold the roof in place while you work.
Measure and cut new pillars: Measure the height and width of the space where the old pillars were located and cut new pillars to size. Make sure to use appropriate materials for your climate and porch design.
Install new pillars: Place the new pillars in position and secure them to the porch using brackets or screws. If the pillars are supporting a roof, make sure to reinforce the roof with new beams or supports as needed.
Finish and paint: Once the new pillars are securely in place, sand and paint them to match the existing porch design. Consider adding decorative details like trim or moldings to enhance the porch’s appearance.
Remember to prioritize safety when working on any home improvement project. Use appropriate safety gear like gloves, goggles, and a dust mask, and consider hiring a professional if you are unsure about any aspect of the repair. By following these steps, you can replace porch pillars and give your porch a fresh, new look.
Can I replace porch pillars without removing the roof?
In some cases, it may be possible to replace porch pillars without removing the roof. However, this will depend on the specific design of your porch and the extent of the damage to the pillars. If the pillars are not directly supporting the roof and are merely decorative, you may be able to remove and replace them without affecting the roof’s stability.
If the porch pillars are supporting the roof, it is not recommended to attempt a repair without consulting a professional. Removing or altering the pillars could compromise the structural integrity of the roof and the entire porch.
In such cases, it is best to hire a contractor or engineer to assess the damage and provide guidance on the most effective and safe repair method. While it may be tempting to try to save money by doing the repair yourself, it is essential to prioritize safety and ensure that the repair is done correctly to avoid potential long-term damage to your home.
How to remove old porch pillars for replacement
Removing old porch pillars for replacement requires careful planning and attention to detail. Here are the steps to follow:
Safety first: Before starting any home improvement project, prioritize safety. Wear appropriate safety gear, such as gloves, goggles, and a dust mask, and ensure that the porch is stable and not at risk of collapsing during the repair.
Remove any attachments: If the old porch pillars have any decorative or functional attachments, such as brackets or lights, remove them first.
Cut through the base: Use a saw to cut through the base of the old pillar where it meets the porch. If the pillar is secured with bolts or screws, remove these as well.
Pry the pillar away: Once the base is cut, use a pry bar to gently pry the old pillar away from the porch. If the pillar is not budging, use a sledgehammer to break it into smaller pieces and remove them one by one.
Clean the area: After removing the old pillar, clean the area where it was located, removing any debris or old materials that may interfere with the installation of the new pillar.
Remember to take your time and work carefully when removing old porch pillars for replacement. If you are unsure about any aspect of the repair, consider consulting a professional to ensure that the job is done safely and effectively.
How to install new porch pillars
Installing new porch pillars can be a great way to refresh the look of your porch while also improving its stability and safety. Here are the steps to follow:
Measure and cut the new pillar: Use a measuring tape to measure the height and width of the space where the new pillar will be installed. Using a saw, cut the new pillar to the appropriate length.
Prepare the base: Depending on the design of your porch, you may need to add a base plate to provide a stable foundation for the new pillar. If necessary, measure and cut the base plate to fit the space and attach it securely to the porch.
Install the pillar: Place the new pillar onto the base plate and ensure that it is level and plumb. Use shims as needed to ensure that the pillar is stable and not wobbling. Once the pillar is in the correct position, secure it to the porch using screws or bolts.
Add decorative elements: Once the new pillar is installed, you can add any decorative elements, such as brackets or trim, to enhance the appearance of the porch.
Repeat for other pillars: If you are replacing multiple pillars, repeat the above steps for each pillar.
Remember to take your time when installing new porch pillars, and double-check your work at each step to ensure that the pillar is level, stable, and securely attached to the porch. If you are unsure about any aspect of the installation, consider consulting a professional to ensure that the job is done safely and effectively.

How to reinforce porch pillars for stability
Reinforcing porch pillars is an essential part of ensuring the stability and safety of your porch. Here are the steps to follow:
Inspect the porch pillars: Before reinforcing your porch pillars, inspect them to identify any damage or weak spots. Look for cracks, rot, or other signs of wear and tear that may affect the stability of the pillars.
Choose the appropriate reinforcement method: Depending on the extent of the damage and the design of your porch, you may need to use one or more reinforcement methods. Common reinforcement methods include adding metal brackets or straps, installing additional support posts, or pouring concrete footings.
Install metal brackets or straps: If your porch pillars are in relatively good condition but need additional support, consider installing metal brackets or straps. These can be attached to the pillars and the porch beam to provide additional support and stability.
Install additional support posts: If your porch pillars are severely damaged or unstable, you may need to install additional support posts. These posts can be placed next to the existing pillars and secured to the porch beam and the ground with screws or bolts.
Pour concrete footings: If your porch pillars are sinking or shifting due to an unstable foundation, consider pouring concrete footings. This involves digging a hole next to the pillar and pouring a concrete foundation to provide a stable base.
Remember to take your time when reinforcing your porch pillars, and choose the appropriate method based on the extent of the damage and the design of your porch. If you are unsure about any aspect of the reinforcement process, consider consulting a professional to ensure that the job is done safely and effectively.
How much does it cost to replace porch pillars?
The cost of replacing porch pillars can vary depending on several factors such as the material of the pillars, the size and design of the porch, the location, and the cost of labor in the area. On average, the cost of replacing a single porch pillar can range from $100 to $1,500, but it can be higher for larger or more intricate designs.
For example, if you’re replacing a wooden porch pillar, the cost may range from $100 to $300 per pillar. However, if you’re replacing a more complex design made of materials like wrought iron or stone, the cost can be much higher, ranging from $500 to $1,500 per pillar.
In addition to the cost of the pillars themselves, you’ll also need to consider the cost of labor and any additional materials needed for installation. If you’re hiring a contractor to complete the replacement, you can expect to pay an additional fee for their services, which can range from $50 to $150 per hour.
Overall, the cost of replacing porch pillars can vary widely depending on your specific situation. To get an accurate estimate of the cost for your porch, it’s best to consult with a contractor or home improvement professional.
How to replace porch pillars with stone veneer
Replacing porch pillars with stone veneer can add an elegant and sophisticated touch to your porch. Here’s how to do it:
Prepare the surface: Clean the surface of the existing porch pillars to ensure that the stone veneer will adhere properly. If the existing pillars are made of wood, cover them with a layer of cement board to create a stable base for the stone veneer.
Choose the stone veneer: Select the type of stone veneer that you want to use for your porch pillars. Stone veneer is available in a variety of colors, textures, and styles, so choose one that complements the style and design of your porch.
Measure and cut the stone veneer: Measure the height and circumference of the porch pillars and cut the stone veneer to fit. You can use a saw or a grinder to cut the stone veneer to the correct size.
Apply the stone veneer: Apply a layer of mortar to the surface of the porch pillars, then carefully place the stone veneer onto the mortar. Use a trowel to spread the mortar evenly and to push it into the crevices between the stones.
Let the mortar dry: Allow the mortar to dry completely, which may take up to 24 hours.
Add finishing touches: Once the mortar is dry, you can add finishing touches such as sealing the stone veneer or adding a decorative trim.
Replacing porch pillars with stone veneer can be a challenging project, especially if you’re not familiar with working with masonry materials. If you’re unsure about any aspect of the project, consider hiring a professional contractor to ensure that the job is done safely and effectively.
How to replace porch pillars with fiberglass
Replacing porch pillars with fiberglass can be a great option if you want a low-maintenance, durable, and lightweight material. Here’s how to do it:
Remove the old pillars: Start by removing the old porch pillars. This may require cutting them off at the base if they are stuck or cemented in place.
Measure and cut the fiberglass: Measure the height and circumference of the porch pillars, and cut the fiberglass columns to fit. You can use a saw or a grinder to cut the fiberglass to the correct size.
Attach the fiberglass columns: Once the fiberglass columns are cut to size, position them in place where the old columns were removed. Attach the fiberglass columns to the base and the roof using screws or bolts.
Cover the seams: Use fiberglass putty to cover the seams between the columns and the base and roof. Allow the putty to dry completely before moving on to the next step.
Paint the columns: Finally, paint the fiberglass columns in the color of your choice. You can use a paint designed specifically for use on fiberglass to ensure that it adheres properly.
Replacing porch pillars with fiberglass is a relatively easy and straightforward process that can be completed in just a few steps. However, if you’re not comfortable working with power tools or handling heavy objects, it’s best to hire a professional contractor to complete the job for you.
How to paint porch pillars after replacement
Once you have replaced your porch pillars, you may want to paint them to give your porch a fresh new look. Here are the steps to follow for painting porch pillars after replacement:
Clean the surface: Before painting your porch pillars, it’s important to clean the surface thoroughly to remove any dirt, dust, or debris. You can use a pressure washer or a hose with a high-pressure nozzle to clean the pillars. Allow the surface to dry completely before moving on to the next step.
Sand the surface: Use sandpaper to lightly sand the surface of the porch pillars. This will help the paint adhere better and create a smoother finish. Wipe away any dust with a clean, dry cloth.
Apply primer: Apply a coat of primer to the porch pillars using a paintbrush or a roller. This will help the paint adhere better and ensure a more even finish. Allow the primer to dry completely before moving on to the next step.
Paint the pillars: Once the primer has dried, it’s time to paint the porch pillars. Choose a high-quality exterior paint that is designed for use on masonry surfaces. Apply the paint in thin, even coats, using a paintbrush or a roller. Allow each coat to dry completely before applying the next one.
Finish with a sealant: Once the paint has dried, apply a coat of sealant to the porch pillars to protect the surface from moisture and UV rays. Allow the sealant to dry completely before using the porch.
Painting porch pillars after replacement is a great way to give your porch a fresh new look. Follow these steps to ensure a professional-looking finish that will last for years to come.
Can I replace porch pillars one at a time?
Yes, you can replace porch pillars one at a time, and this may be the best approach if you want to avoid removing the entire porch roof. Replacing one pillar at a time will also help to maintain the structural integrity of the porch and ensure that it remains stable throughout the process. However, it’s important to note that this method will likely take longer and require more effort than replacing all the pillars at once.
When replacing porch pillars one at a time, it’s important to start with the pillar that is in the worst condition. This will help to prevent further damage to the porch and ensure that the new pillar is strong enough to support the weight of the roof.
Once the first pillar has been replaced, you can move on to the next one, working your way around the porch until all the pillars have been replaced. This approach will require some patience and careful planning, but it can be a cost-effective way to repair your porch without having to take on a major renovation project.
How to match new porch pillars with the existing ones
Matching new porch pillars with existing ones can be a challenge, especially if the existing pillars are old or weathered. Here are some tips to help you match new porch pillars with the existing ones:
Consider the material: One of the most important factors to consider when matching porch pillars is the material they are made of. If your existing porch pillars are made of wood, for example, you’ll want to choose new pillars that are made of the same type of wood and have a similar grain pattern. If your existing pillars are made of stone or brick, you’ll want to choose new pillars that have a similar color and texture.
Look at the design: The design of your existing porch pillars can also be a helpful guide when choosing new ones. Take note of any decorative elements, such as carvings or fluting, and try to find new pillars that have a similar style. If your existing pillars are simple and understated, you may want to choose new ones that have a similar minimalist design.
Consult with a professional: If you’re having trouble finding porch pillars that match your existing ones, consider consulting with a professional. An experienced contractor or architect can help you choose the right materials and design elements to ensure that your new porch pillars blend seamlessly with your existing ones.
Matching new porch pillars with existing ones can be a challenging process, but with careful consideration and the help of a professional, you can create a cohesive and visually appealing porch that will enhance the beauty and value of your home.
What materials are best for porch pillars replacement?
There are several materials that are commonly used for porch pillars replacement, and the best material for your project will depend on your budget, personal style, and the overall design of your home. Here are some of the most popular materials used for porch pillars replacement:
Wood: Wood is a classic choice for porch pillars, and it’s a versatile material that can be painted or stained to match the style of your home. Cedar, redwood, and mahogany are popular choices for their durability and resistance to rot and decay.
Stone: Stone porch pillars are a popular choice for their durability and natural beauty. Granite, limestone, and sandstone are popular choices for their strength and durability, and they can be cut and shaped to match the style of your home.
Fiberglass: Fiberglass is a lightweight and durable material that is resistant to rot, decay, and insect damage. It’s also easy to paint or finish, making it a versatile option for porch pillars replacement.
PVC: PVC porch pillars are a low-maintenance and affordable option that can be made to look like wood, stone, or other materials. They are also resistant to rot, decay, and insect damage, making them a durable choice for any climate.
Metal: Metal porch pillars, such as wrought iron or aluminum, can add a modern touch to your porch design. They are durable and can be painted or finished in a variety of colors to match your home’s style.
Ultimately, the best material for your porch pillars replacement will depend on your personal style and the design of your home. Consult with a professional contractor or architect to determine the best material for your project.
What tools do I need to replace porch pillars?
Replacing porch pillars typically requires a range of tools, depending on the specific project and materials being used. Here are some of the tools you may need:
Measuring tape: You will need a measuring tape to determine the height, width, and length of the new porch pillars.
Saw: A saw is needed to cut the new porch pillars to the correct size and shape. The type of saw you will need depends on the material being used.
Drill: A drill is needed to create holes for screws, bolts, and other fasteners.
Level: A level is essential to ensure that the new porch pillars are installed straight and level.
Screwdrivers and wrenches: You will need a range of screwdrivers and wrenches to tighten and adjust the fasteners.
Safety equipment: Depending on the specific project and tools being used, you may need safety equipment such as goggles, gloves, and a respirator mask.
Scaffolding or ladder: Depending on the height of your porch, you may need a scaffold or ladder to safely access the top of the porch pillars.
The exact tools you will need may vary depending on the specific project, so consult with a professional contractor or architect to determine the tools required for your porch pillar replacement project.
Our conclusion on how to replace pillars on porch
We have shown you how to replace pillars on porch, so the process should be much easier now. Replacing porch pillars may seem like a big undertaking, but with the right tools and knowledge, it can be a manageable DIY project.
Always prioritize safety, assess the extent of the damage, and prepare accordingly before starting the repair. With a little patience and attention to detail, you can give your porch a new and improved look that will last for years to come.