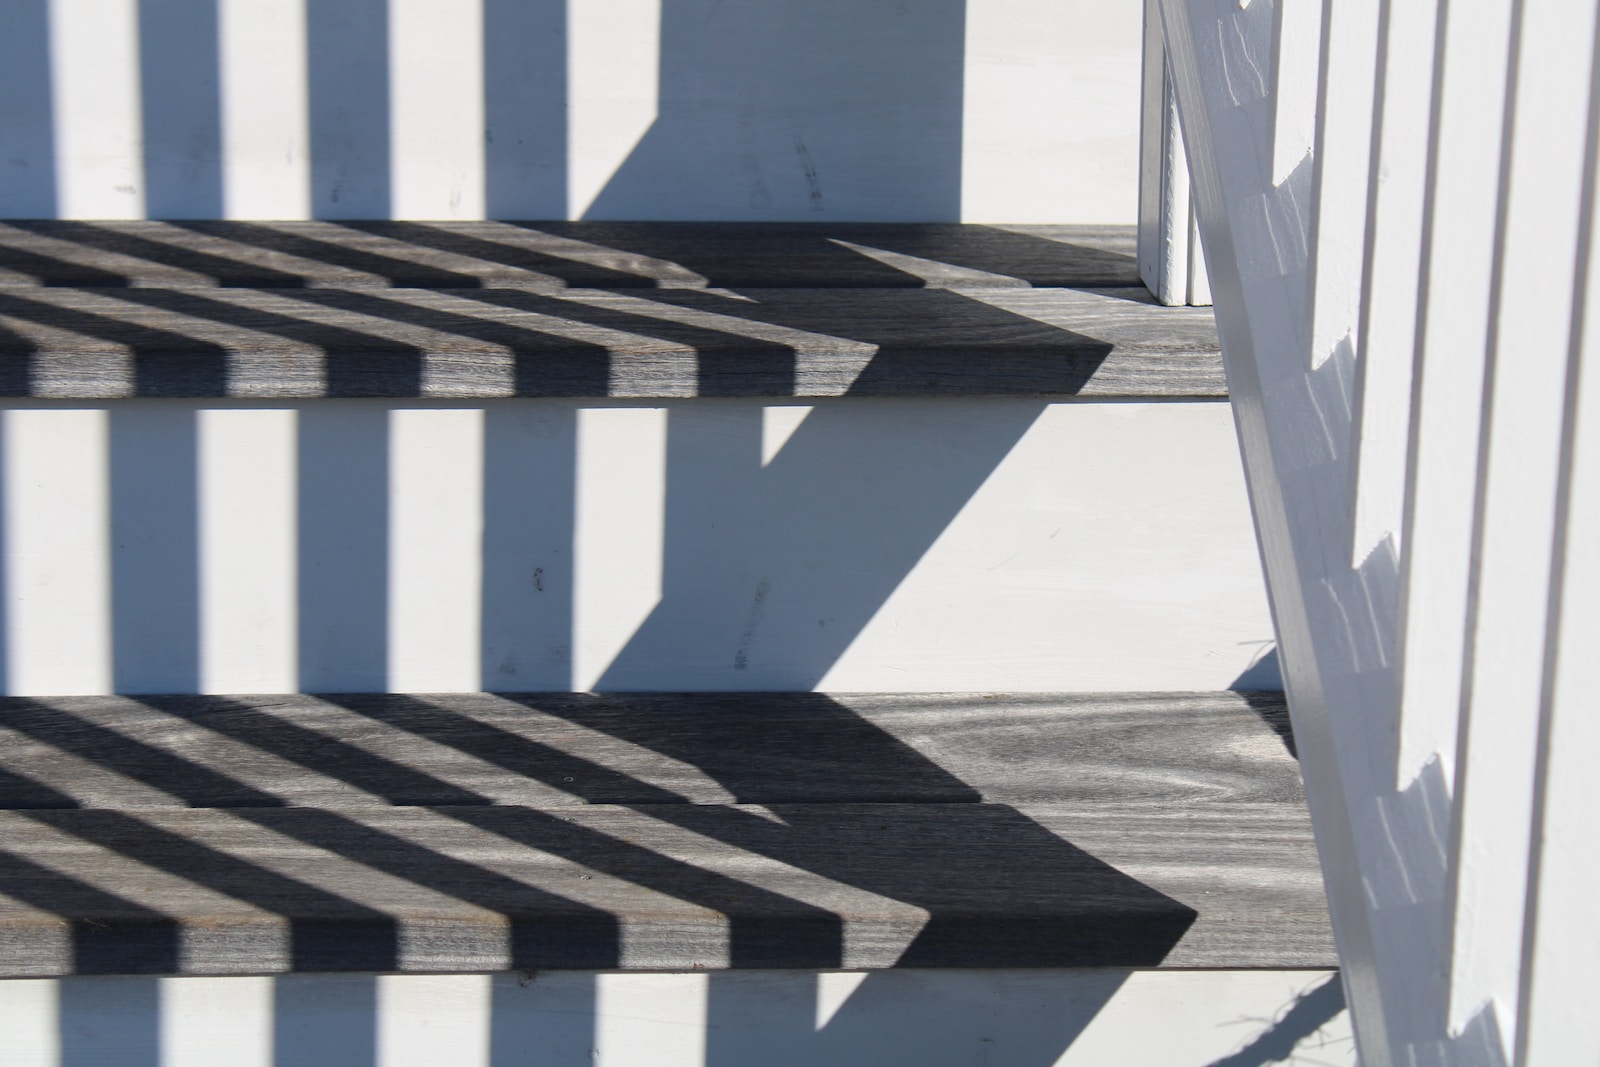
In this guide, you will learn how to repair porch steps, so that you can keep your living space safe and usable. Porch steps are an essential part of any home’s exterior, providing a safe and convenient entryway to your home.
However, over time, porch steps can become damaged or worn out due to weathering, age, or heavy use. In this article, we will explore various ways to repair porch steps, covering different perspectives and techniques.
How to repair porch steps
Contents
- 1 How to repair porch steps
- 2 Preventing Future Damage
- 3 How to repair porch steps made of wood
- 4 How to repair porch steps with rusted metal railings
- 5 How to repair porch steps made of concrete
- 6 How to fix cracks in porch steps
- 7 How to replace damaged porch steps
- 8 How to repair loose porch steps
- 9 How to fix broken porch steps
- 10 How to repair porch steps with mortar
- 11 How to repair porch steps with epoxy
- 12 How to repair porch steps with cement
- 13 How to repair porch steps with bricks
- 14 How to repair porch steps with pavers
- 15 How to repair porch steps without removing them
- 16 How to repair uneven porch steps
- 17 What tools are needed to repair porch steps?
- 18 Final thoughts on how to repair porch steps
Repairing porch steps is an important part of home maintenance, as damaged or worn-out steps can pose a safety hazard. Here are the steps to repair porch steps:
Assessing the Damage
The first step in repairing porch steps is to assess the extent of the damage. This will help you determine the best course of action for repairing the steps. Here are some common types of damage that porch steps can experience:
Cracks and chips: Porch steps made of concrete or stone can develop cracks and chips over time, which can become tripping hazards.
Rotting wood: Wooden porch steps can rot due to exposure to moisture, which can weaken the structure and make the steps unsafe to use.
Loose or broken bricks: If your porch steps are made of brick, loose or broken bricks can create a tripping hazard and compromise the stability of the steps.
Worn-out treads: Over time, the treads of porch steps can become worn out, making them slippery and unsafe to use.
Repairing the Damage
Once you have assessed the damage, it’s time to start repairing the porch steps. Here are some techniques for repairing common types of porch step damage:
Cracks and chips: To repair cracks and chips in concrete or stone porch steps, you can use a concrete patching compound or stone repair epoxy. First, clean the damaged area thoroughly and remove any loose debris. Then, apply the patching compound or epoxy according to the manufacturer’s instructions. Once the compound is dry, sand the area smooth.
Rotting wood: If your wooden porch steps are rotted, you will need to remove the damaged wood and replace it with new wood. Start by removing any loose or rotted wood using a pry bar and hammer. Then, cut a new piece of wood to fit the damaged area, and attach it to the existing structure using wood screws. Finally, sand the new wood to match the existing steps and apply a coat of paint or stain to protect it from moisture.
Loose or broken bricks: If your porch steps are made of brick, you can replace loose or broken bricks using mortar. First, remove any loose or broken bricks using a chisel and hammer. Then, mix a batch of mortar according to the manufacturer’s instructions and apply it to the area where the bricks will be placed. Insert the new bricks into the mortar and use a level to ensure that they are level and flush with the existing steps. Allow the mortar to dry completely before using the steps.
Worn-out treads: To repair worn-out treads on porch steps, you can apply a non-slip coating or install new treads. Non-slip coatings can be applied directly to the existing treads and will provide better traction. If you choose to install new treads, start by removing the old treads using a pry bar and hammer. Then, cut new treads to fit the existing steps and attach them using wood screws or adhesive.
You can see a more detailed way to fix various types of materials used in the building of porch steps further below. Be sure to check those out for a step-by-step guide!
Preventing Future Damage
To prevent future damage to your porch steps, there are some simple maintenance tasks you can do:
Keep the steps clean: Regularly sweep and clean your porch steps to remove dirt, leaves, and other debris that can cause damage.
Seal wooden steps: If your porch steps are made of wood, apply a coat of sealant to protect the wood from moisture and prevent rot.
Use mats or rugs: To prevent wear and tear on your porch steps, use mats or rugs on high-traffic areas.
Repair damage promptly: When you notice damage to your porch steps, repair it as soon as possible to prevent it from getting worse.
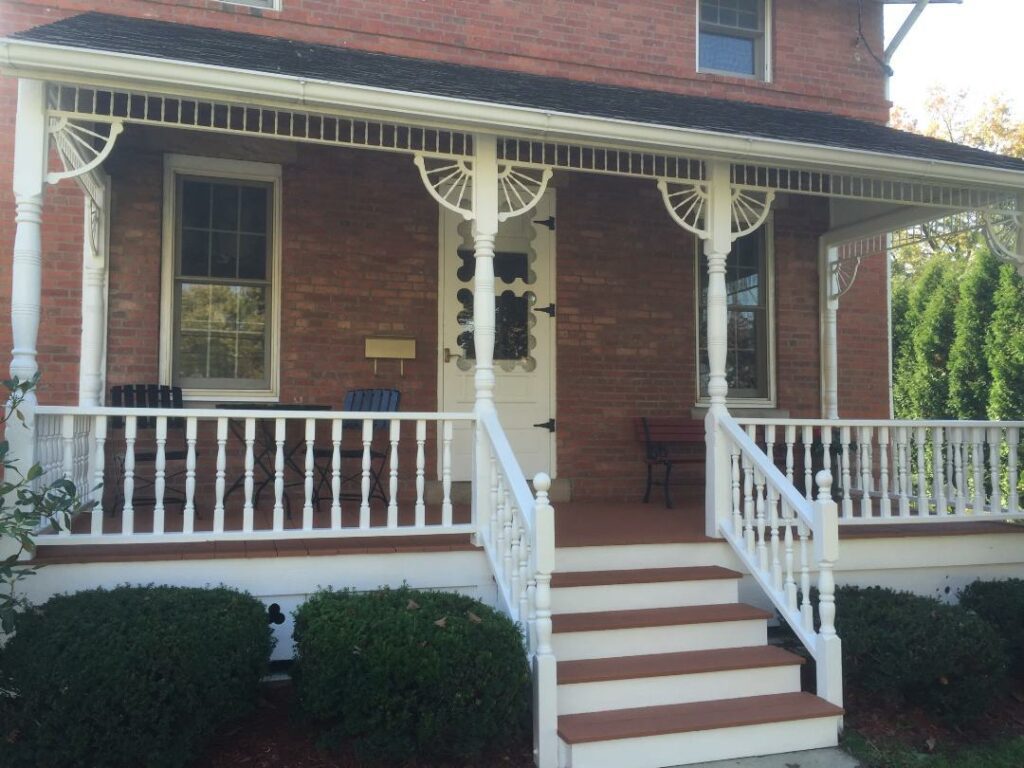
How to repair porch steps made of wood
Repairing porch steps made of wood is a relatively straightforward process that can be done with a few basic tools and some elbow grease. Here are the general steps you can follow to repair your porch steps:
Remove any loose or damaged pieces of wood: Start by removing any loose or damaged pieces of wood using a pry bar or hammer. Be sure to remove all the nails or screws from the wood.
Clean the area: Use a stiff-bristled brush to clean the area where the damaged wood was removed. Remove any debris or dirt from the area.
Measure and cut new wood: Measure the length and width of the area that needs to be repaired and cut a piece of new wood to fit. Be sure to use pressure-treated wood to avoid future decay.
Install the new wood: Apply a thin layer of wood glue to the back of the new wood and press it into place. Use clamps to hold the wood in place until the glue dries. Then, use galvanized screws or nails to secure the wood to the underlying structure.
Sand and paint the repaired area: Sand the repaired area until it is smooth and even with the surrounding wood. Then, paint or stain the new wood to match the color of the existing porch steps.
Seal the area: Finally, apply a waterproof sealant to the repaired area to protect it from moisture and prevent future decay.
By following these steps, you can repair your porch steps made of wood and ensure they are safe and sturdy for years to come.
How to repair porch steps with rusted metal railings
If you have porch steps with rusted metal railings, it’s important to repair them promptly to prevent further damage and ensure safety. Here are the general steps you can follow to repair porch steps with rusted metal railings:
Clean the rusted areas: Use a wire brush or sandpaper to remove as much rust as possible from the affected areas. You can also use a rust converter solution to help stop the rusting process.
Check for damage: Inspect the railings for any signs of damage, such as cracks or holes. If you find any, you may need to replace the affected sections of the railing.
Apply rust inhibitor: Apply a rust inhibitor to the cleaned and repaired areas of the metal railing. This will help to prevent further rusting and protect the metal from future damage.
Paint or stain the railing: Once the rust inhibitor has dried, you can paint or stain the metal railing to protect it from the elements and improve its appearance.
Inspect and maintain: Regularly inspect your porch steps and metal railings for signs of rust or damage. Touch up any areas that require attention and maintain the railing to ensure it remains in good condition.
By following these steps, you can repair porch steps with rusted metal railings and ensure that they remain safe and functional for years to come.
How to repair porch steps made of concrete
Repairing porch steps made of concrete is a process that can be completed with some basic tools and materials. Here are the general steps you can follow to repair porch steps made of concrete:
Clean the area: Start by cleaning the area around the damaged concrete with a stiff-bristled brush to remove any debris or loose concrete.
Assess the damage: Assess the extent of the damage to the concrete. If it’s minor, you may be able to patch it with a concrete patching compound. If the damage is more extensive, you may need to remove and replace the entire step.
Mix the patching compound: If patching the damaged area, mix the concrete patching compound according to the manufacturer’s instructions. Mix only enough compound that you can use within the given time frame, as it can set quickly.
Apply the patching compound: Apply the patching compound to the damaged area using a trowel, making sure it is evenly applied and level with the surrounding concrete surface.
Let the compound dry: Allow the patching compound to dry completely. This can take several hours to overnight, depending on the temperature and humidity.
Sand and finish: Sand the patched area until it is smooth and level with the surrounding concrete. You can also apply a concrete sealer or paint to the repaired area to improve its appearance and protect it from future damage.
By following these steps, you can repair porch steps made of concrete and ensure they remain safe and functional for years to come.
How to fix cracks in porch steps
Fixing cracks in porch steps is an essential maintenance task to keep them safe and functional. Here are the general steps you can follow to fix cracks in porch steps:
Clean the area: Clean the area around the crack using a stiff-bristled brush to remove any debris, dirt, or loose concrete.
Widen the crack: Use a chisel and hammer to widen the crack, creating a V-shaped groove. This will help the patching material to adhere better and prevent the crack from expanding further.
Apply the patching material: Apply a concrete patching compound to the crack, using a trowel to ensure it is evenly distributed and level with the surrounding concrete.
Smooth the patching material: Smooth the patching material with a trowel, making sure it blends in with the surrounding concrete. You can also use a sponge or a wet finger to create a smooth finish.
Let the compound dry: Allow the patching material to dry completely. This can take several hours to overnight, depending on the temperature and humidity.
Sand and finish: Sand the patched area until it is smooth and level with the surrounding concrete. You can also apply a concrete sealer or paint to the repaired area to improve its appearance and protect it from future damage.
By following these steps, you can fix cracks in porch steps and ensure they remain safe and functional for years to come.
How to replace damaged porch steps
Replacing damaged porch steps can be a more involved project, but it can be done with some basic tools and materials. Here are the general steps you can follow to replace damaged porch steps:
Remove the damaged step: Using a hammer and chisel, break up the damaged step into smaller pieces and remove them. Be sure to wear protective gear such as gloves and safety glasses.
Prepare the area: Clean the area where the damaged step was removed and ensure it is level.
Measure and cut the new step: Measure the dimensions of the opening and cut a new step from pressure-treated lumber to fit.
Install the new step: Apply construction adhesive to the bottom of the new step and set it into place. Use a level to ensure it is level and secure it in place with screws.
Add finishing touches: Sand any rough edges and apply paint or stain to match the existing porch steps.
By following these steps, you can replace damaged porch steps and ensure they remain safe and functional for years to come.
How to repair loose porch steps
Repairing loose porch steps is a relatively simple process that can be done with some basic tools and materials. Here are the general steps you can follow to repair loose porch steps:
Inspect the steps: Start by inspecting the porch steps to identify the cause of the looseness. Common causes include loose nails or screws, rotting wood, or a shifting foundation.
Tighten loose screws or nails: If the looseness is caused by loose screws or nails, use a screwdriver or hammer to tighten them.
Replace rotting wood: If the looseness is caused by rotting wood, remove the damaged section of wood and replace it with new, pressure-treated lumber. Secure the new lumber in place with screws.
Check the foundation: If the looseness is caused by a shifting foundation, address the underlying foundation issue before repairing the steps.
Add support: Install additional support by installing braces or blocks under the steps to prevent them from shifting or moving.
Secure the steps: Secure the porch steps in place using screws or bolts, depending on the design of the steps.
By following these steps, you can repair loose porch steps and ensure they remain safe and functional for years to come.
How to fix broken porch steps
Fixing broken porch steps is a more involved project, but it can be done with some basic tools and materials. Here are the general steps you can follow to fix broken porch steps:
Inspect the steps: Start by inspecting the broken porch steps to identify the extent of the damage. Common problems include broken or split wood, cracked concrete, or damaged metal.
Remove damaged material: Remove any damaged material, such as broken wood or concrete, using a hammer, chisel, or saw.
Replace damaged wood: If the damage is limited to the wood, cut a new piece of lumber to fit the area and secure it in place using screws.
Patch damaged concrete: If the damage is limited to the concrete, apply a concrete patching compound to fill in the damaged area. Smooth the patching compound with a trowel and allow it to dry completely.
Replace damaged metal: If the damage is limited to the metal railings, replace the damaged section of railing with a new section. Secure the new railing in place using screws or bolts.
Sand and finish: Sand any rough edges and apply paint or stain to match the existing porch steps.
By following these steps, you can fix broken porch steps and ensure they remain safe and functional for years to come.
How to repair porch steps with mortar
Repairing porch steps with mortar can be an effective solution to fix cracks and other types of damage. Here are the general steps you can follow to repair porch steps with mortar:
Clean the area: Clean the area around the damaged section of the porch steps using a stiff-bristled brush to remove any debris, dirt, or loose mortar.
Wet the area: Wet the damaged area with water before applying the mortar. This will help the mortar adhere better and prevent it from drying too quickly.
Mix the mortar: Mix the mortar according to the manufacturer’s instructions. For larger repairs, a mortar mixer may be necessary.
Apply the mortar: Apply the mortar to the damaged area using a trowel, making sure it is evenly distributed and level with the surrounding porch steps.
Smooth the mortar: Smooth the mortar with a trowel or a wet finger, making sure it blends in with the surrounding porch steps.
Let the mortar dry: Allow the mortar to dry completely. This can take several hours to overnight, depending on the temperature and humidity.
Sand and finish: Sand the repaired area until it is smooth and level with the surrounding porch steps. You can also apply a concrete sealer or paint to the repaired area to improve its appearance and protect it from future damage.
By following these steps, you can repair porch steps with mortar and ensure they remain safe and functional for years to come.
How to repair porch steps with epoxy
Repairing porch steps with epoxy can be an effective solution to fix cracks and other types of damage. Here are the general steps you can follow to repair porch steps with epoxy:
Clean the area: Clean the area around the damaged section of the porch steps using a stiff-bristled brush to remove any debris, dirt, or loose materials.
Prepare the epoxy: Mix the two-part epoxy according to the manufacturer’s instructions. For larger repairs, you may need to mix the epoxy in small batches.
Apply the epoxy: Apply the epoxy to the damaged area using a putty knife, making sure it is evenly distributed and level with the surrounding porch steps.
Smooth the epoxy: Smooth the epoxy with a putty knife or a wet finger, making sure it blends in with the surrounding porch steps.
Let the epoxy cure: Allow the epoxy to cure completely. This can take several hours to overnight, depending on the temperature and humidity.
Sand and finish: Sand the repaired area until it is smooth and level with the surrounding porch steps. You can also apply a concrete sealer or paint to the repaired area to improve its appearance and protect it from future damage.
By following these steps, you can repair porch steps with epoxy and ensure they remain safe and functional for years to come.
How to repair porch steps with cement
Repairing porch steps with cement can be an effective solution to fix cracks and other types of damage. Here are the general steps you can follow to repair porch steps with cement:
Clean the area: Clean the area around the damaged section of the porch steps using a stiff-bristled brush to remove any debris, dirt, or loose materials.
Wet the area: Wet the damaged area with water before applying the cement. This will help the cement adhere better and prevent it from drying too quickly.
Mix the cement: Mix the cement according to the manufacturer’s instructions. For larger repairs, a cement mixer may be necessary.
Apply the cement: Apply the cement to the damaged area using a trowel, making sure it is evenly distributed and level with the surrounding porch steps.
Smooth the cement: Smooth the cement with a trowel or a wet finger, making sure it blends in with the surrounding porch steps.
Let the cement dry: Allow the cement to dry completely. This can take several hours to overnight, depending on the temperature and humidity.
Sand and finish: Sand the repaired area until it is smooth and level with the surrounding porch steps. You can also apply a concrete sealer or paint to the repaired area to improve its appearance and protect it from future damage.
By following these steps, you can repair porch steps with cement and ensure they remain safe and functional for years to come.
How to repair porch steps with bricks
Repairing porch steps with bricks can be an effective solution to fix damage and improve their appearance. Here are the general steps you can follow to repair porch steps with bricks:
Remove damaged bricks: Use a chisel and hammer to remove any damaged or loose bricks from the porch steps. Be careful not to damage any surrounding bricks.
Clean the area: Clean the area where the damaged bricks were removed using a stiff-bristled brush to remove any debris, dirt, or loose materials.
Wet the area: Wet the area where the new bricks will be placed with water. This will help the mortar adhere better and prevent it from drying too quickly.
Mix the mortar: Mix the mortar according to the manufacturer’s instructions. For larger repairs, a mortar mixer may be necessary.
Apply the mortar: Apply a layer of mortar to the area where the new bricks will be placed using a trowel.
Place the new bricks: Place the new bricks in the mortar, making sure they are level with the surrounding bricks. Use a level to ensure the new bricks are flush with the rest of the porch steps.
Fill in the gaps: Fill in the gaps between the new and surrounding bricks with more mortar, using a trowel to smooth and level it.
Let the mortar dry: Allow the mortar to dry completely. This can take several hours to overnight, depending on the temperature and humidity.
Clean the bricks: Once the mortar is dry, use a damp cloth or sponge to clean any excess mortar from the surface of the new bricks.
By following these steps, you can repair porch steps with bricks and ensure they remain safe and functional for years to come.
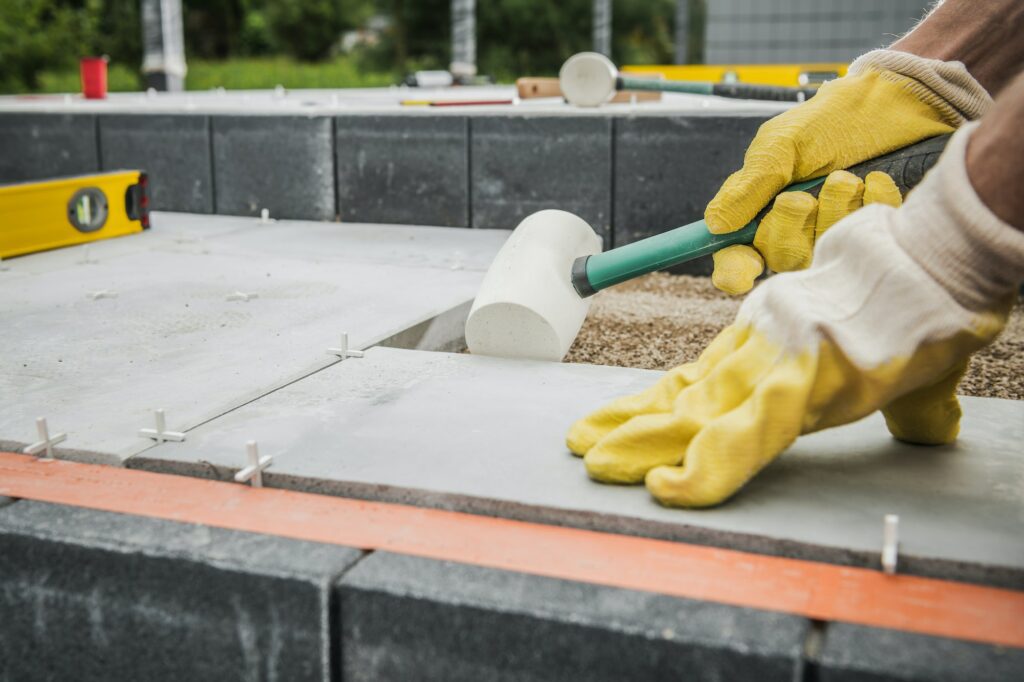
How to repair porch steps with pavers
Repairing porch steps with pavers can be an effective solution to fix damage and improve their appearance. Here are the general steps you can follow to repair porch steps with pavers:
Remove damaged pavers: Use a pry bar and a hammer to remove any damaged or loose pavers from the porch steps. Be careful not to damage any surrounding pavers.
Clean the area: Clean the area where the damaged pavers were removed using a stiff-bristled brush to remove any debris, dirt, or loose materials.
Wet the area: Wet the area where the new pavers will be placed with water. This will help the sand adhere better and prevent it from drying too quickly.
Add sand: Add a layer of sand to the area where the new pavers will be placed. Use a trowel to level the sand and ensure it is evenly distributed.
Place the new pavers: Place the new pavers on the layer of sand, making sure they are level with the surrounding pavers. Use a level to ensure the new pavers are flush with the rest of the porch steps.
Fill in the gaps: Fill in the gaps between the new and surrounding pavers with more sand, using a broom to sweep it into the cracks.
Compact the pavers: Use a plate compactor or a rubber mallet to compact the new pavers and ensure they are firmly in place.
Add more sand: Add more sand to the gaps between the pavers and sweep it in with a broom until the gaps are completely filled.
Clean the pavers: Once the sand is in place, use a damp cloth or sponge to clean any excess sand from the surface of the new pavers.
By following these steps, you can repair porch steps with pavers and ensure they remain safe and functional for years to come.
How to repair porch steps without removing them
Repairing porch steps without removing them can be a convenient option if the damage is minor. Here are some steps to follow:
Clean the steps: Begin by cleaning the steps thoroughly with a stiff-bristled brush and water. Remove any debris or dirt that may have accumulated on the surface.
Inspect the damage: Check for any cracks or chips in the steps that need repair. Mark these areas with chalk or masking tape so that you can focus your repair efforts.
Fill the cracks: Use a concrete patching compound or epoxy to fill any cracks or chips in the steps. Apply the patching compound or epoxy with a putty knife, filling the damaged areas until they are level with the rest of the step’s surface. Allow the compound or epoxy to dry according to the manufacturer’s instructions.
Sand the repaired areas: Once the compound or epoxy is dry, use sandpaper to smooth out the repaired areas until they are flush with the rest of the step’s surface.
Apply a sealant: After the repairs are complete, apply a sealant to the entire surface of the steps. The sealant will help protect the steps from further damage caused by exposure to weather or foot traffic.
By following these steps, you can repair porch steps without removing them, but it’s important to note that this method is best for minor repairs. If the damage is significant, it may be necessary to remove and replace the damaged steps.
How to repair uneven porch steps
Repairing uneven porch steps requires a bit of patience and attention to detail. Here are some steps to follow:
Assess the cause of the unevenness: Before you start the repair, try to identify what is causing the unevenness. It could be due to soil settling, poor construction, or other reasons. Addressing the root cause will ensure the issue does not recur after the repair.
Remove the treads: To repair the uneven porch steps, you will need to remove the treads first. Use a pry bar to remove them carefully.
Assess the risers: Check the risers for any damage. If they are damaged, remove and replace them.
Address the unevenness: Once you have removed the treads, assess the degree of unevenness. If it is minor, you may be able to use shims or sand to level the steps. If it is significant, you may need to use concrete or masonry blocks to create a solid and level base.
Install a new tread: Once you have leveled the base, install a new tread. Use galvanized screws to attach it to the stringers.
Repeat the process: Repeat the process for all the treads until all the steps are level.
Clean and seal the steps: After the repair is complete, clean the steps thoroughly and apply a sealant to protect them from the elements.
By following these steps, you can repair uneven porch steps and ensure they remain safe and functional for years to come. However, if you’re not comfortable tackling this project, it’s best to consult with a professional.
What tools are needed to repair porch steps?
The tools needed to repair porch steps can vary depending on the type and extent of the damage. However, here is a list of some common tools that you may need:
Safety gear: Wear protective gear like gloves, safety glasses, and a dust mask to protect yourself during the repair process.
Pry bar: Use a pry bar to remove the damaged or loose treads and risers.
Hammer: You may need a hammer to remove any loose nails and to secure the new treads and risers.
Circular saw: A circular saw can be used to cut new treads and risers to size.
Chisel: You may need a chisel to remove any old adhesive or mortar from the steps.
Level: A level will help you check that the steps are even and level after the repair.
Measuring tape: Use a measuring tape to measure the dimensions of the treads and risers to ensure they fit properly.
Putty knife: Use a putty knife to apply patching compound or epoxy to fill in any cracks or chips in the steps.
Concrete mix: If the steps are made of concrete, you may need concrete mix to repair any cracks or chips.
Sealant: Once the repairs are complete, apply a sealant to protect the steps from further damage.
These are just some of the tools you may need to repair porch steps. The exact tools needed will depend on the type and extent of the damage. It’s always a good idea to assess the damage and make a list of the tools and materials you will need before starting the repair process.
Final thoughts on how to repair porch steps
In conclusion, learning how to repair porch steps puts you at a great advantage. This is a task that can be easily accomplished with the right tools and techniques. Whether your porch steps are made of concrete, stone, wood, or brick, there are different ways to repair them depending on the type of damage.
As mentioned, it’s important to assess the damage, choose the appropriate repair technique, and take steps to prevent future damage. By following these steps, you can maintain safe and functional porch steps for your home.